Are you looking for a way to express your creativity and create something beautiful? Painting a buttercup flower is a great way to do that, and it’s easier than you might think! In this article, we’ll explain the step-by-step process of painting a buttercup flower, from gathering the supplies to adding shadows and highlights.
We’ll also provide some helpful tips to make your painting look as realistic and amazing as possible.
So, grab your supplies and let’s get started!
Table of Contents
Short Answer
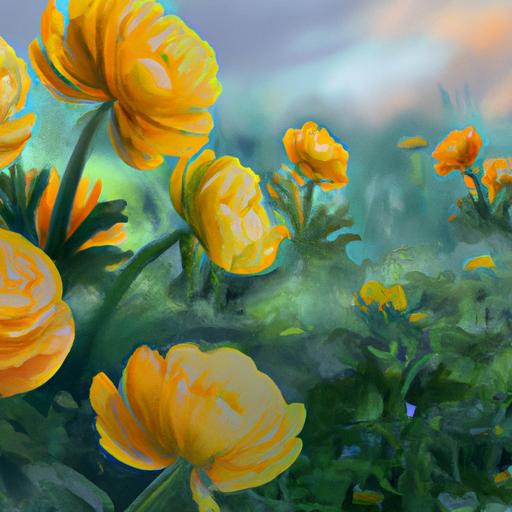
To paint a buttercup flower, start by sketching the outline of the flower in light pencil on a canvas or paper.
Next, begin to paint the overlapping petals of the flower in yellow paint, using a thin brush to add texture and detail.
Then, use a small brush to paint small green leaves around the petals.
Finally, paint the flower’s center with a dark yellow or orange, using a small round brush for a realistic look.
Gathering Supplies
Painting a buttercup flower can be a fun and rewarding experience, and the best way to start is by gathering the necessary supplies.
Youll need paintbrushes of various sizes, acrylic paints in shades of yellow, a canvas or paper of your choice, and a few other items.
Depending on the look you are going for, you may also want to gather a few different shades of green to use for the foliage and stem of the flower.
Having all of your supplies gathered before you start will help to make the painting process easier and more enjoyable.
Sketching the Flower

When it comes to painting a buttercup flower, it all begins with sketching the flower and its petals.
To do this, start by finding a reference image of the flower and tracing it onto your preferred canvas or paper.
It is important to draw the flower and its petals lightly, as this will allow for easy erasing and adjustments.
Once the basic shape of the flower is sketched out, you can begin to further refine the petals and stem.
Make sure to take your time and draw each petal with care, as this will help create a more realistic and beautiful painting.
To aid in accuracy, use a ruler to draw the petals and a compass to draw out the center, if needed.
Once the basic sketch is complete, you will be ready to start painting.
Painting the Petals
Painting the petals of a buttercup flower is one of the most important steps in creating a beautiful painting.
Start by sketching out the shape of the flower and its petals on your canvas or paper of choice.
Make sure to use a pencil or light-colored marker so that it is easy to erase any mistakes.
Once your sketch is finished, begin using yellow paint to fill in the petals.
Make sure to use a bright, vivid yellow to create a realistic effect.
Then, use a darker shade of yellow to outline the petals and create a subtle shadow effect.
This will give your flower more dimension and make it look more realistic.
Finally, add a deep, golden yellow to the center of the flower to give it a more vibrant look.
With a bit of patience and practice, you’ll be able to create a beautiful buttercup flower painting.
Adding Detail to the Center of the Flower

Adding detail to the center of the flower can be one of the most rewarding steps in painting a buttercup flower.
With the right skill and patience, you can give your flower a vibrant and lifelike appearance.
The center of the flower should be filled in with a deep, golden yellow.
This will give the flower its signature buttercup look.
You can use a small brush to do this, as it will give you more control over the details.
Alternatively, you can use a larger brush to fill in the entire center.
Just be sure to leave some of the light yellow from the petals to give the flower some texture.
When adding the center, you may want to use a darker shade of yellow for the outline.
This will give the flower some definition and make it stand out against the background.
You can also use a lighter shade of yellow to add some highlights, which will make the flower look more realistic.
Finally, you can add some green foliage and a stem to the painting.
This will give the flower a more natural look and help it blend in with other elements in the painting.
It will also add some depth and texture to the flower.
With some practice and patience, you can easily add detail to the center of your buttercup flower painting.
Don’t be afraid to experiment with different shades of yellow and green to get the effect you’re looking for.
Once you have the center of the flower completed, you can move on to the next step in the process.
Adding Foliage and a Stem
Once you have your buttercup flower sketched and painted, its time to add in some foliage and a stem.
This can help create a more realistic look and can even help to bring out the details of your flower.
To begin, use a green paint to create simple shapes for the foliage.
Start with a base layer of green and then use a lighter and darker shade of green to add some depth and texture.
Additionally, you can use a darker green to create shadows and highlights for a more three-dimensional look.
Finally, use a brown paint to create the stem of your flower.
Start by sketching out a basic shape of the stem with a thin brush and then add in details like branches and leaves to bring it to life.
To finish, use a darker shade of brown to create shadows and highlights for a more realistic look.
With a few simple steps, you can easily add foliage and a stem to your buttercup flower painting.
Creating Shadows and Highlights

The last step of painting a buttercup flower is to create a three-dimensional effect by adding shadows and highlights to the petals.
This is done by using a darker shade of yellow to add shadow and a lighter shade of yellow to add highlights.
To create shadows, use a small brush to apply a thin layer of the darker yellow paint at the base of each petal.
The shadows should be applied sparingly, blending in with the petal to create a subtle effect.
For highlights, use a small brush to apply a thin layer of the lighter yellow paint at the tips of each petal.
Again, the highlights should be applied sparingly, blending in with the petal to create a subtle effect.
The shadows and highlights should be blended together to create a natural looking three-dimensional effect.
With patience and practice, you can easily create a beautiful buttercup flower painting.
Tips for Painting Buttercup Flowers
Painting a buttercup flower is a fun and rewarding experience, and with a few simple tips, you can create a beautiful painting.
First, select the right materials for the job.
Start with a canvas or paper of your choice, along with quality paintbrushes and acrylic paints.
Be sure to select the right colors for your painting; a deep golden yellow for the petals and a darker shade of yellow for the outlines will make your flower look more realistic.
Next, sketch out the shape of the flower and its petals.
This will help you to get an idea of the proportions of the flower and make sure everything is in the right place.
After sketching, use the yellow paint to fill in the petals and outline them with the darker shade of yellow.
Then, add in the center of the flower with the deep, golden yellow.
For an extra touch, you can add in foliage and a stem.
Use a variety of different shades of green to create a realistic effect.
Finally, use a darker shade of yellow to create shadows and highlights on the petals.
This will give the flower a three-dimensional effect and make it look even more realistic.
With patience and practice, you can easily create a beautiful buttercup flower painting.
Follow these tips and you’ll be on your way to creating a stunning masterpiece.
Final Thoughts
Painting a buttercup flower can be a gratifying experience for any skill level.
With the right supplies, careful sketching, and patience, anyone can create a beautiful buttercup flower painting.
Now that you know the steps and tips for painting a buttercup flower, why not try it for yourself? Grab some paints and brush up on your skills!