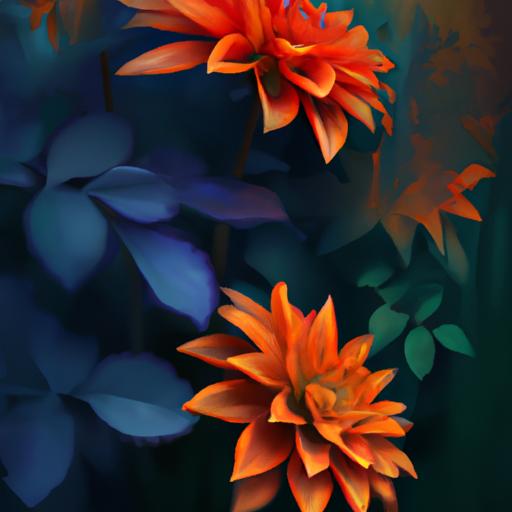
Do you want to create something beautiful and unique? Look no further than making a paper dahlia! With just a few simple steps, you can create a stunning paper flower that will be the envy of all who see it.
In this article, well walk you through the five steps to make your very own paper dahlia.
From gathering supplies and cutting out the petals, to arranging and gluing the center, youll be equipped with the knowledge to make a paper dahlia that will be a beautiful addition to any room.
Lets get started!
Table of Contents
Short Answer
Making a paper dahlia is relatively easy! First, cut out a circle from a piece of paper.
Next, cut out eight petal shapes from the circle and curl them inwards towards the center of the circle.
Then, cut out a small circle for the center of the dahlia and glue the petals and circle together.
Finally, add a stem and leaves to the back of the flower to complete the look.
Gather Supplies
When making a paper dahlia, the first step is to gather the necessary supplies.
You will need paper in a variety of colors, scissors, glue, and a pencil.
You can choose any type of paper you like, such as cardstock or construction paper.
It is best to use several different colors to create a vibrant and eye-catching dahlia.
Additionally, you can get creative and add some extra embellishments to the flower, such as glitter, rhinestones, or sequins.
Once you have gathered all the supplies, you are ready to begin crafting your paper dahlia.
Cutting Out the Petals and Leaves

Making a paper dahlia is an easy and fun craft project that can be enjoyed by all ages.
After gathering the supplies, the next step is to cut out the petals and leaves.
You can use any kind of paper, such as construction paper, cardstock, or even printer paper.
Using a sharp pair of scissors, cut out several petal shapes in the desired size.
You can make them all the same size or mix it up for a more realistic look.
For the leaves, you can draw the shape on the paper and cut it out or use a pre-made template.
Once you have cut out all the petals and leaves, you are ready to assemble the dahlia.
Arranging the Petals
Once all the supplies have been gathered, it is time to begin the process of making the paper dahlia.
The first step is to cut out the shapes of the petals and leaves from the paper.
When cutting out the petals, make sure to leave a little bit of extra paper around the edges for arranging.
Once the petals have been cut out, arrange them on the table in a circular shape.
This can be done by overlapping the petals slightly and making sure that the edges of the petals are lined up with each other.
Depending on the size of the dahlia, you may need to add more petals to the arrangement.
Once the petals have been arranged to your satisfaction, it is time to start gluing them together.
Using a small amount of glue, attach the petals to each other around the edges and in the center.
This will help to secure the petals in place and create a strong foundation for the flower.
Once the petals have been glued together, your paper dahlia is almost complete!
Drawing and Cutting Out the Center of the Flower

Once the petals have been cut out and arranged in a circular shape, it’s time to draw and cut out the center of the flower.
This step is essential in making a paper dahlia, as it gives the flower its unique shape and texture.
To begin, take a pencil and draw the center of the flower onto the paper.
This can be a simple circle for a basic dahlia, or you can get creative and draw a more intricate design.
Once the center has been drawn, use scissors or a craft knife to carefully cut it out.
Make sure to cut out the center of the flower slowly and precisely, as this will ensure that the flower turns out looking its best.
Once the center has been cut out, it is ready to be glued in the center of the flower.
Glue the Center of the Flower
When it comes to crafting a paper dahlia, the next step is to glue the center of the flower.
This can be done with a hot glue gun or craft glue.
If using a hot glue gun, make sure to use a low temperature setting to prevent the paper from burning.
When using craft glue, a thin layer should be applied to the center shape and then placed in the center of the flower.
Be sure to press down gently to ensure the petals and center are firmly attached.
Once the center is secure, its time to attach the leaves to the back of the flower.
This can be done with either glue or staples.
If youre using staples, be sure to use small ones to prevent them from showing on the front of the flower.
After the leaves are attached, your paper dahlia is complete! With a few simple steps, you can make a beautiful paper dahlia that is sure to be admired.
Attaching the Leaves

The final step of making a paper dahlia is to attach the leaves to the back of the flower.
This is a simple process that requires a few basic supplies and a little bit of time.
To get started, you will need a few sheets of paper, scissors, glue, and a pencil.
Begin by cutting out two or three leaves from the paper.
Make sure to cut them into an oval or teardrop shape.
Once you have the leaves cut out, take the glue and attach them to the back of the flower.
Make sure to evenly space them out to create a symmetrical look.
If desired, you can also use a pencil to draw veins and other details onto the leaves.
Once the leaves are glued in place, your paper dahlia is complete! With just a few simple steps and supplies, you can create a beautiful paper dahlia that is perfect for decorating any space.
Final Touches
Once you have assembled your petals and leaves, it’s time to finish off your paper dahlia.
To do this, you’ll need to attach the leaves to the back of the flower.
To do this, apply some glue to the back of the leaves, and carefully position them onto the back of the flower.
Once the leaves are in place, add a few more dots of glue around the edges of the petals to reinforce the structure.
The leaves should be pointing inwards to create a realistic-looking dahlia.
Finally, you can use a small piece of paper or a ribbon to create a stem for your flower.
Cut a long strip and attach it to the back of the flower with glue.
This will make it easier to display your paper dahlia.
And there you have it a beautiful paper dahlia that you created with your own hands! This craft project has a lot of potential, and you can use different types of paper and other materials to create unique and interesting designs.
So why not get creative and make a paper dahlia today?
Final Thoughts
Making a paper dahlia is a fun and easy way to get creative! With just a few simple steps and some basic handcrafting skills, you can have your own beautiful paper dahlia.
So why not give it a try? Grab some supplies and get started today on this fun and rewarding craft project!